Sunday, December 13, 2015

Herbs & Spices Rack (2015)

A coworker of mine had her kitchen renewed. She asked me if I was able to build her some kind of spice rack.
Finished rack

Before I started I needed to know how the rack should look like. She send me a picture with the notes of the measurements and the request to close the back and do something nice with a router, making it look more classy.
Example picture
I started to make a 3D drawing with the info I had gotten and immediately got to the problem the measurements weren't right. It needed to be deeper; else the herb containers wouldn't fit and it needed to be higher or the lowest ones wouldn't be able to go in and out. The new measurements weren't a problem.
Then I suddenly got the request if I could make a coffee filter holder connected to the rack. I did some drawing of that, but it looked very odd. And on second thought she herself didn't think it was such a good idea to hang those underneath the herbs and spiced (due to spicy coffee)
Instead I came up with the idea to make a holder for the paper kitchen towels.
First drafts of the rack
Rack with kitchen towel holder
(left with "cut off" side, right with a more classy curve)

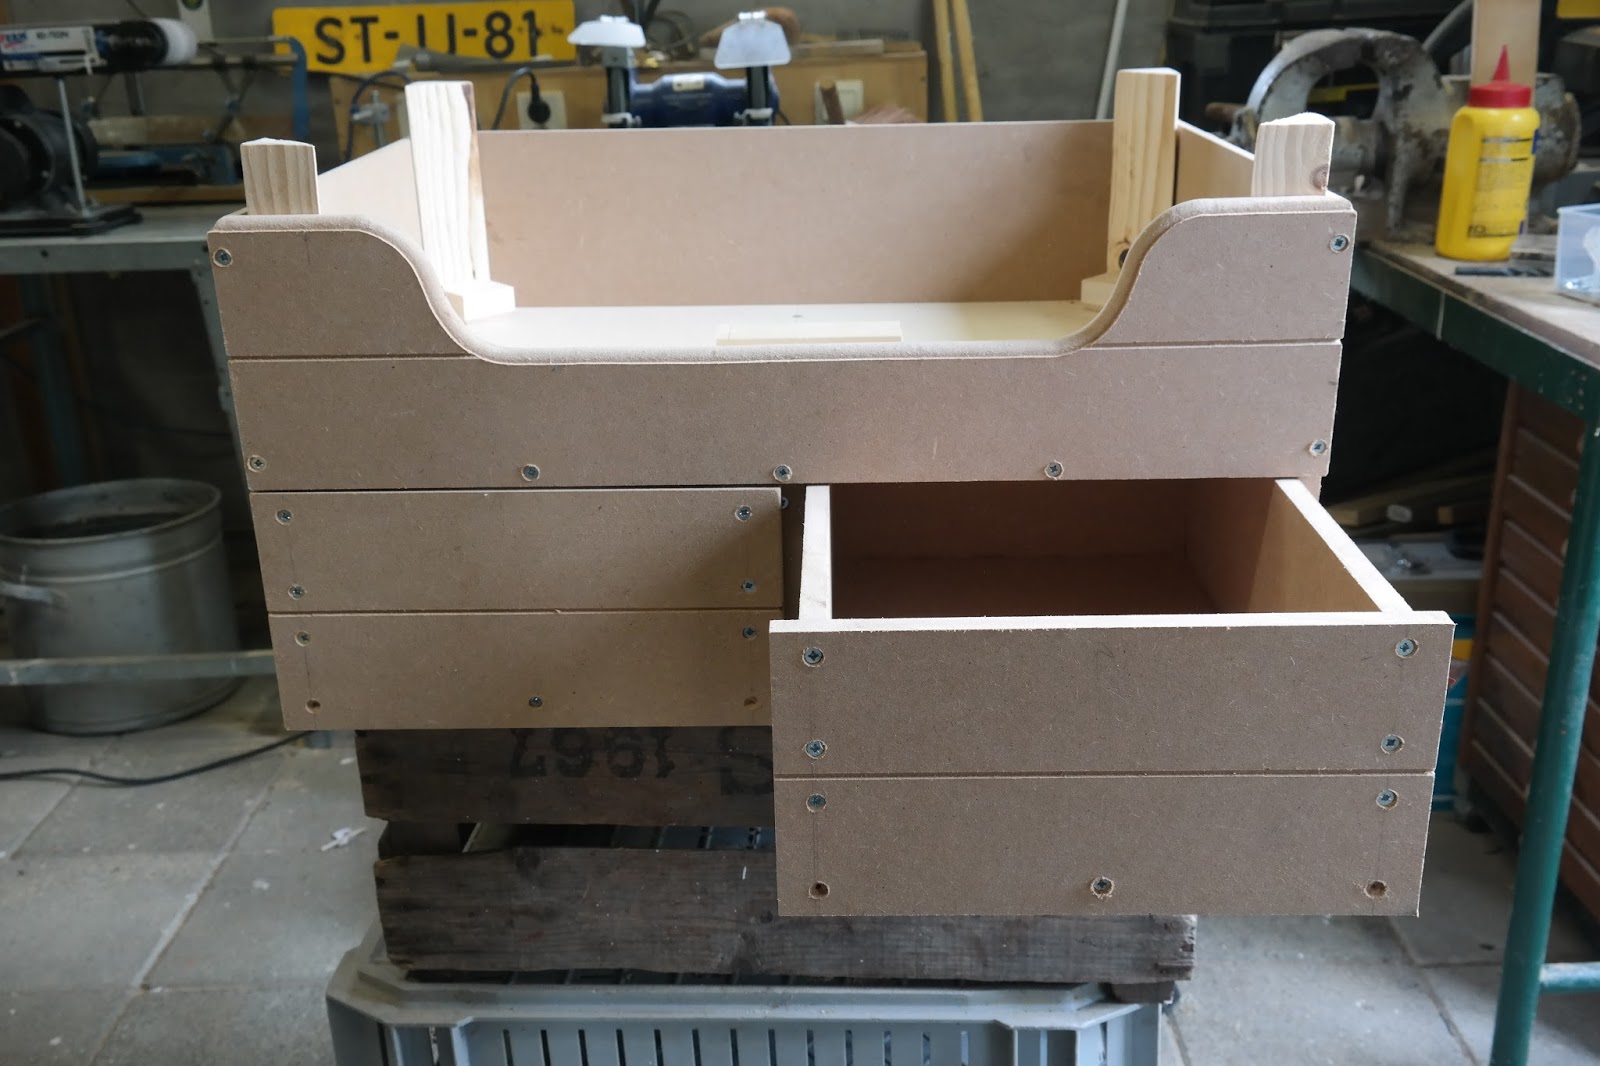
With everything approved I was able to start.
Everything was made from MDF except the square rods which were pine. 


Everything put together (not glued or screwed yet)

At first she wanted it to be grey and later she decided white would be better. I was happy I hadn't already put everything in a grey primer...
After several coats of white it was finished.

Side view of the finished rack

Dog Bed Evy (2015)

This year we got a puppy; it's a French Bulldog mix and a real goofy dog.
She slept in a dog bench to be house-trained. Once she was house-trained she needed a new place to sleep. Therefor I build her a dog bed with 2 drawers to storage a bunch of her toys.

3D drawing
The main idea was to make a bed that looked like an apple crate; which is a quite common item around here due to all the orchards.
I wanted to make it out of left over pallet wood, but I wasn't able to get my hands on some spare parts. So I decided to make my own version out of MDF.

With a router I grinded some horizontal lines to imitate separate planks.
The parts together made a box; with triangular pieces it turned from a box into a crate.

Closed
One drawer open

Both drawers open

When the woodwork was finished, some fake screw holes were made while the actual screw holes were filled up and sanded smooth.

1 layer of primer and the filled screw holes

After a nice layer of grey primer it was time to give it the actual color; which was also grey.
The top edge was painted white.
When everything was an even color I used my wood imitation techniques to paint a simple pine grain all around.

Wood grain backside
Finished front side with open drawers


I was in doubt to add some stamps, but it would probably look to chaotic, so I left it the way it was.
I added some rope to the drawers; this way our dog is able to open them herself. (Now we have to learn her to close them too)

End result with our little doggie.


Thursday, October 15, 2015

FruitCorso: The Lights of Happiness (2015)

Just like last year and the years prior, I joined the FruitCorso again to build a new float decorated with seeds, fruits and vegetables.

The design this year was done by Ria van Blijderveen. The design was: "The Lights of Happiness"
The visual of this are 2 old asian/ chinese "ghosts" who send lanterns into the sky.
There was a whole message behind it about the chaotic and rushed times everybody experiences.

Model of the float, made by our designer Ria van Blijderveen
My main job this year was to focus on the faces. My "Partner in Styrofoam" did a pretty good job making a face for me to work on (creating the details). The other one I made myself.
I was also in charge of making the hands. I've tried to teach my knowledge to the designer, but she hated to work with Styrofoam, which left me no choice but to do it myself.

Next to that I was given a free hand to choose whatever I'd like to decorate the face.
At the market I found some Brasil nuts and pine nuts; these had the perfect color for the light faces. Even thought I've never worked with these before, I gave it a shot and turned out great.
I do need to note that these nuts will turn slightly darker in a few weeks and they are a bit more difficult to glue due to their oily surface. But with some patients it ended well.

Below you see the stages of the head I made and decorated:

Step 1: Styrofoam (with a layer of paper)
Step 2: Add plaster to smooth things out,
make the nose more Asian
I used clay for details (eye lids, lips)


Step 3: Paint
Step 4: Add seeds, nuts
Do the same on the other side


Finish it off with more seeds and some grass plumes (eyebrows/ beard)
Fun Fact: I've used about 18 different types of seeds/nuts on the face alone.

The other face has been done in those same steps. I instructed someone who's with the FruitCorso since last year (actually 2, but in the first year she never touched any seeds).
I think she did an amazing job.

But with some paint and a different perspective
 he resembles a friendly, slightly sad Smeagol.
Eveyone thought he looked a bit angry and pouty


In the end he lost his "Smeagolness" and looked like a friendly old man.


Bonus pictures of the build

A head isn't a head if it doesn't have ears. (Unless he was never born with them or lost them in an accident)
These I made using some cardboard, tin foil, hot glue and paper maché (newspaper + wallpaper glue)

Different steps of the process of ear making
Because it's hard to explain what your ideas are with words, I made a sketch to visualize my thoughts. I got a "go" from the designer. Also this sketch was helpful to explain things to the other builder.
Sketch of my thoughts of what I wanted to do with the eyes.
Next are some stages of the total build.

Metal skeleton of the total float. There were some changes and additions later on.


This part of lanterns was put on with a crane at the day of the parade.
It was a nerve wrecking moment!

The framework of the front "Ghostman"

The finished lanterns on the transportation cart

Side view of the front "Ghostman"
This is one of my hands.
Well, not mine, but one I've made


The end result!
If you're curious: We've got 5th place, which isn't really that bad. We're happy with the end result.

Saturday, June 20, 2015

Birdhouse "Owl" (2015)

When my niece went to live together with her boyfriend I asked her if she liked a specific kind of gift, useful for her new house.
She told me she liked it if I could make something for the garden, something for the birds. Something like a birdhouse. One type of birds she really liked were owls.

Finished piece siting in a tree

I went to Google and looked for inspiration for birdhouses in combination with owls and ended up with this picture:

Picture I found

My niece kinda liked that idea, but she liked it a little more "realistic". I started to sketch a bit with some owl pictures as reference which led to this:
First drawing

This picture was approved by my niece, with the mention I would alter some things about it because I wasn't fully pleased with it.
I scanned the picture to the computer and used Photoshop to do some minor adjustments. The owl got a little big fatter, his feet got bigger and he became smaller (or his head became bigger in proportion, depending how you look at it.)
Altered drawing

This image was used to become a template which I could transfer to wood.
On a different piece of paper I drew the template for the wings and tail and I changed the shape of his claws, making him a bit more friendly.
On a copy I drew the shape of the house part, on this I could take measurements (size/ angles) easily.
The bird was sawn and put together using glue and nails. At the right side I left a piece out, which later became a little hatch. This way, if it would be inhabited, you can check and clean inside.

Wooden version
Side view of the bare wooden version


When the sawing part was done it was time to do the detailed paint job.
I've never done birds before, making it quite tricky.  I tried to do every feather separately, using a variation of colors. It might not be a perfect owl mimic, but I do think it looks great.

Top view during the painting.
Left wing has some guidelines, right wing is done.
Bottom view, the wings still have to be done.


Eyes
Something new I did were the eyes. In the past I've tried to make some fake eyes using polyester resin globes, but their quite tricky to cast.
On the internet I found a little diy shop that sold cabochon glass pieces. These are perfect for this purpose. They measure about 3 cm (the biggest they got). The eyes were printed and glued to the back. This sounds easier than it sounds though, it took several tries. Best result I got was to print on photo paper and use a fair amount of acrylic varnish as a glue. You can move the picture for a small amount of time, before pressing it into a piece of crafts foam.
I am a bit bummed I don't have my Photosmart printer anymore, because the black isn't perfectly black the way I like it.
After the varnish has dried, use black paint for the edges and end off with at least 2 coats of varnish to prevent any leakage of water getting to your paper.

However, if you don't got a good printer, you can always paint it from the back; start with the pupil and the outer edge, then work with the colors of the eye. Benefits of this technique is that it won't discolor that much due to sunlight + you won't have to worry too much about the rain. (It just takes a more steady hand an time to make)

Owl sitting on a pole.
Owl hanging on a nail.


Side view of the finished piece.
Close up of the face, showing the vivid eyes and detail paint work.


Puzzle box "Bram" (2015)

An old colleague of my mother asked it I could make a little puzzle box for her grandson. She has seen this online, but those makers quit their business and she was wondering if I wasn't able to make one.

Finished piece

Sure, no problem.
I made a box of plywood and added a lid where I saw out his name. I transferred the holes to another piece of plywood and saw those letters out too.
Because I didn't like the holes when the box was closed I added another lid, on which the letters could rest and closed off the box.

Some parts were stained others only varnished.
In the end I added the date of birth.
Side view; The lid in front with the letters underneath
Top view with the letters out.
This is where the toddler can try and put his name through the holes.

I'm not sure about the measurements anymore, but it should be about an A4 size box of about 14 cm tall.
End result