Sunday, December 28, 2014

Steampunk chest (2014)

My room is often a big mess. I keep a cardboard box for cardboard/ paper and a plastic bag for plastic recycling. Of course this isn't really nice to the eye. Therefor I wanted to make a box for it. And while I was at it, why not do a Steampunk one?

The finished result of the Steampunk recycle box.
Because it's "just" a box, I didn't make a full 3D drawing. I only drew the front bit because I needed to gears to fit perfectly in place in order to rotate.

For this project I used MDF. The dimensions of the box are: 56,5 cm x 35 cm x 30 cm (lxdxh)

The gears were plotted on a piece of paper, which I glued on some 4mm MDF and then sawed out with the help of a fretsaw.

In retrospect you might use plywood instead; perspex, or something similar, would be even better. Because MDF isn't that sturdy.

All the gears I needed for this project.

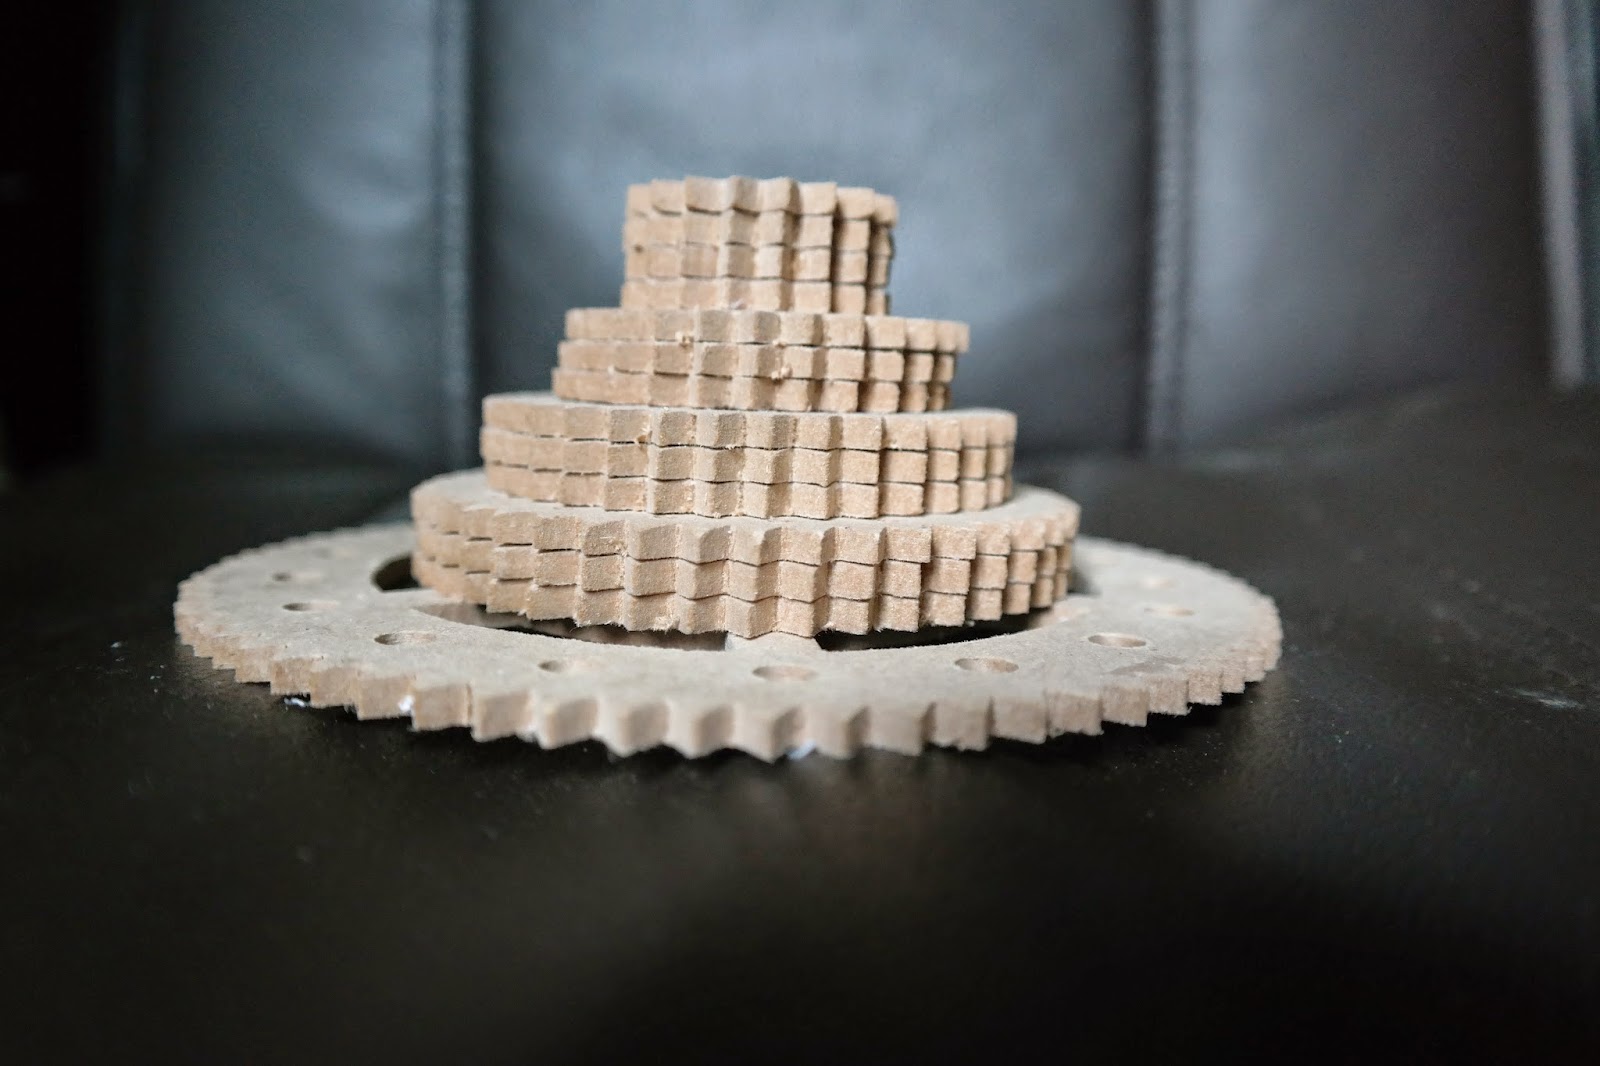
All the gears stacked together.
Next it was time to saw the frame. I plotted this on 2 pieces of paper and with some difficulty managed to saw it out. Because the arm of the fretsaw limits your sawing distance you need to be creative and turn the saw direction 90 degrees. With turns this is a bit tricky. You could also make this in multiple pieces if it's too big to work with.

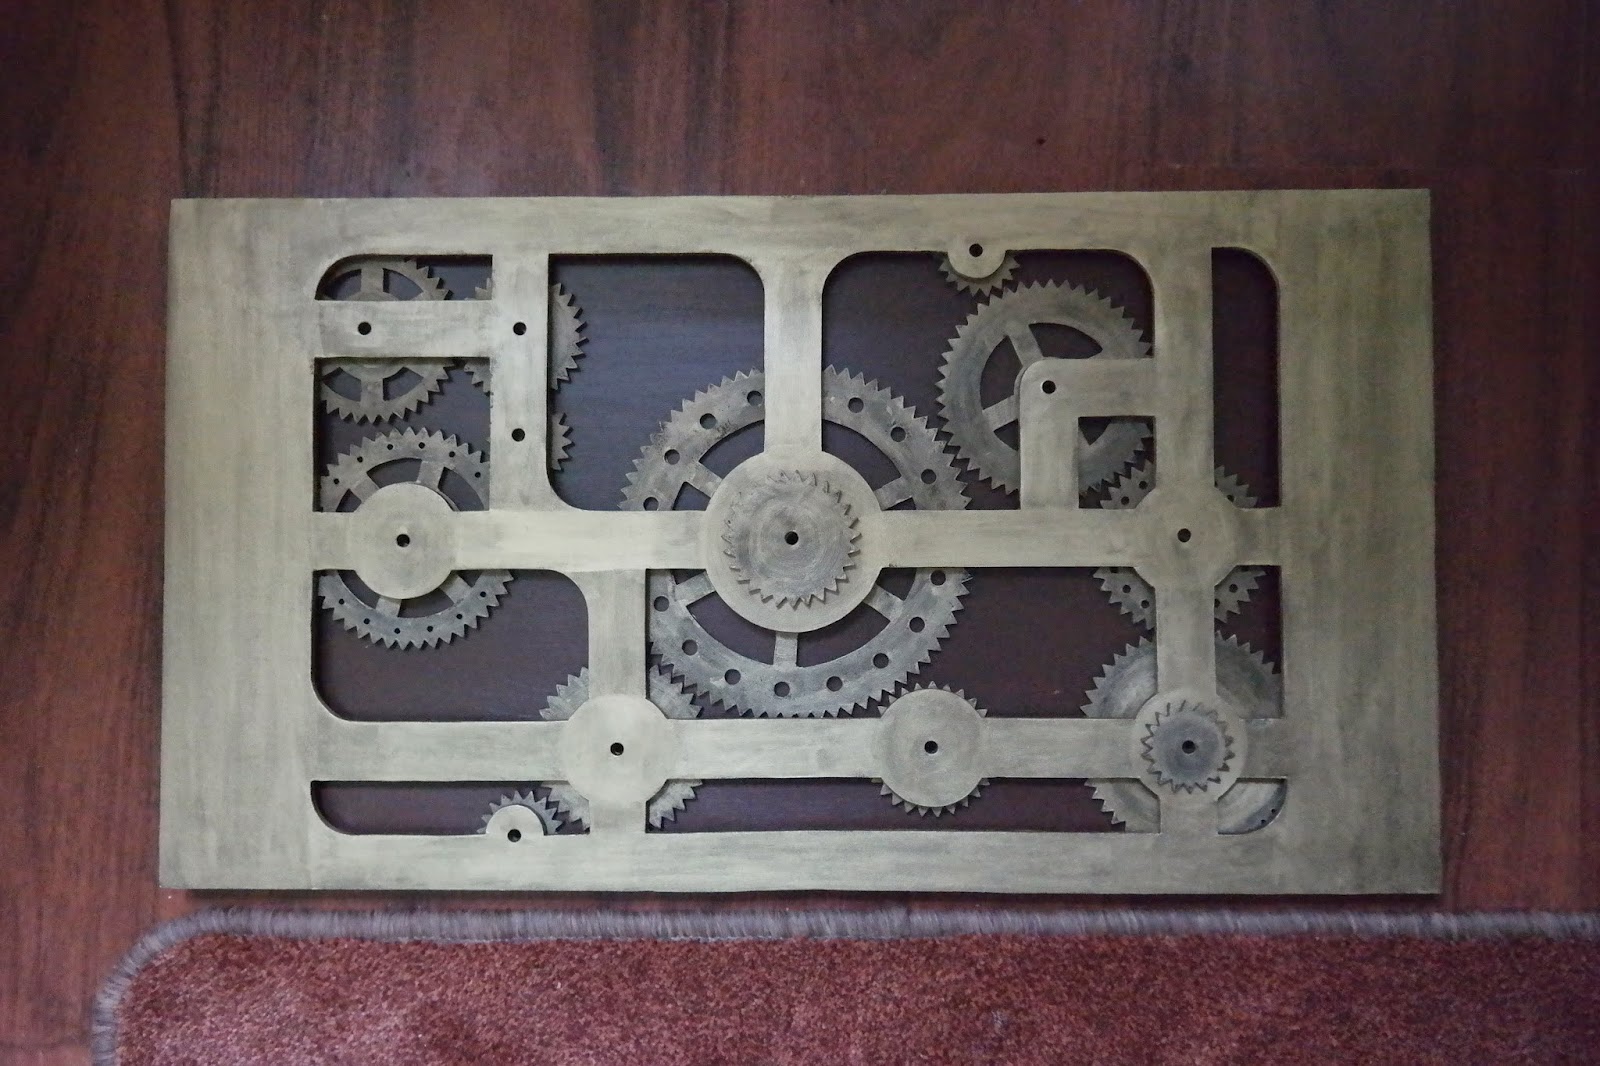
The gears laid in order on the paper template.

What it would look like in the end.
Next up is the paint job. I used a black acrylic base color for the gold pieces. Then I used acrylic gold and smeared it in lightly. I circled on the gears, while the paint was still wet,  to make it look more worn. 
All the gears painted black.


The gears in place (note there is 1 missing), I wanted a worn look, that is why I didn't give the gold a 2nd or 3rd layer, because then the paint job would be smooth and have a "new" look.

The brown was a mixture. I didn't have the chocolate color I used for the display I made a few years ago. I used an orange base for this, because the edges can be worn a bit using sandpaper.
The inside is done with a "caramel" color mixed at the DIY shop.
And the plate on which I mounted the gears has a color called "Temperament", but is nothing more than a crimson/bordeaux like color.
Although it is not really visible on the picture. I dabbed some black paint at the plate along the edges of the frame. This leaves a bit of a worn shadow; places where it is most likely to not be cleaned in years.

Half way the project. I needed to add a lit, some decorative nails and paint the inside.

The gears are attached with a wooden axis. In retrospect: Use iron rods.
I noticed the center wheel takes a lot of resistance. The wheels are able to turn, but not by turning the crank arm (?)
In the main plan I wanted to have a chain run from the center outer wheel to the one on the left, but because it was already unable to rotate the other parts, I skipped this.

I added some decorative nails and it is done.


The finished box.

What it looks like on the inside.
Front side. Despite it's not able to turn it still serves a nice decorative purpose.
A few things I might do: The sides are a bit dull. I might add something to it.
And I'd like to make some fake Victorian hinges.

For those of you wanting to give this a try or wanting to make gears: These are my templates:


If you'd like very specific gears, I can recommend you this template maker:
https://woodgears.ca/gear_cutting/template.html


Wednesday, December 24, 2014

Birth Sign Penguin (2014)

Someone I know ordered a specific design of a birth sign:

Cracked egg
Penguin parachutist


The woman asked me to do sign with a penguin. I asked her to send me some basic pictures I could work with. It was clear she liked some sort of cartoonish penguin baby.

In her request she also asked to make an egg first and once it opened a penguin was revealed and ended up with these 2 ideas:
The 2nd is a basic black/ white penguin (as the send cartoon versions were) and is the traditional one where you pull off the top part of the egg and the penguin sits snuggly in it's shell.
I thought of something more unique: What if you remove the bottom part? Than you end up with an eggshell parachute!

Here are the steps:


1: Make a drawing
2: Saw out the drawing
3: Paint (1st coat is never nice, it needs 2 to 3 coats to be perfectly covered.

Finish it off with some varnish and screw on the parts to attach it to the pole and it's done.

Egg with the pole, it's quite high, but it has
to go about 40-50 cm into the ground.
Revealed after birth.


The single parts are shoved upon 2 bolts, which are tightened with a winged nut.

At the back of the top part of the egg and in the back of the penguin some rings are screwed in on which you can hook the parachute lines.

The sign at his feet are meant to have the name written on, but I wasn't allowed to know the name, so they're writing it at home.

If you'd like to have your own unique birth sign: contact me and we'll discuss the details.


Sunday, September 7, 2014

Birth Sign Bambi (2014)

Last Friday my niece gave birth to a lovely little girl named "Milou"
When she was about 7 moths pregnant she had asked me if I was able to make a birth sign for her to put in the yard when the baby was born (It's tradition here in The Netherlands to do such a thing when a child is born)
Final result of the sign. The name can be removed and hang in the room of the child.
I thought it was a great idea so she send me a picture of Bambi with his mother and a picture of the skunk with flowers. She asked if it was possible to use the flowers from the skunk picture and use them with the picture of Bambi and his mother.
Bambi and his mother

The skunk from Bambi with flowers.
Sure, no problem.
I've used Photoshop to create a new image.

The result of Photoshop
Now it was time to convert it to a wooded board.
I've used birch plywood. This is very light and it's nice and smooth on the surface. I took a piece that was 1,22 m width.

The board was first soaked with a wet cloth. Just enough to color the surface. This way the top fibers will soak up the water and swell, making it easier to smooth the surface later on with sanding.

When it's sanded it got 2 layers of white primer. This was sanded again and it was time to do some drawing.

The pencil drawing on the board.

When I was satisfied with the drawing I used a jig saw to cut out the whole piece.

Once the board was sawn it looked like this.

With things like plywood you will always end up with some torn edges. Most of them are shallow and disappear when sanded, others can be filled up with a small bit of filler.

Now it was time to paint.
I don't have a million cans of different tones of color. So most of them needed to be blended (?) by hand. I mostly used some prior tones like: yellow, blue, red, black and white. But for this project I also got bright pink  (white + red have a tendency to turn more of a salmon tone of pink + with blue it makes a perfect purple) and a mustard type of brown.

Most of the basic paint job done.

When all the colors had been done twice it was time to add the black linings. I used a special kind of brush for this; those small ones with long hairs used for nail art.

Added black linings.
  The sides were painted black too. I also painted the bolts that were needed to fix the board to the pole.


50 Year Sign (2014)


Someone from work had become 50. She hated it when we'd reminded her about it and took 2 weeks off, hoping we'd all forget about it.

Off course we didn't.

As a surprise I made her a sign of her in her reach truck with a package that said "50"
I also added a small bicycle light that was blinking like one of the scappers they use.


Sunday, June 22, 2014

DSW statuette (2014)

As some may know, I once created a character named DSW. He's a half wolf/ werewolf, which means he's furry all the time.

Because most things I made of him are send to friends, I decided to make a little statuette for my own.

This statuette is made from air dried clay; no special, fancy, expensive clay as some thought, but just the cheap brand from the Action. (I'm not saying that's the best clay to use, but it worked)

DSW aka: Dark Shadow Wolf.
 Finished Statuette.

Normally, before sculpting anything I make a drawing of a nice pose. But DSW had a picture I've always used at the forum as my banner. So it made sense to use that pose as my base:
Old drawing made with Paint.
As you can already see I made some alterations to him: He lost his bandana and shirt and his scythe is turned the other way. I thought his torso was too detailed to put it to waste behind a shirt + I didn't really like the bandana for this statuette.
The scythe made more sense pointing the other way, as it is more ready to slash at your opponent.

Back to the process:
I made all his body parts separately.

Tip: Don't do that.

Later I learned that it is best to use a metal armature (Yes I started with this before the wedding sculpture I did some time ago).
The pros of not using it is that you have better access to put in more detail on the arms etc.
The cons, and it's a big con; it's very hard to put your sculpt together.
Not all glues will work on clay (I use wood glue) + a clay torso is relatively heavy, making it terrible to put it on his feet.

That aside:

Attempt to glue his body parts in place using all kinds of pins.

DSW's head.

Front side, finished.

Finished sculpting.

I kept his scythe separate from his body until the end, because it's easier to work with.
In the beginning I wanted to make a mold of it and make resin casts. I contacted with a mold making business for tips but the never replied back. I didn't want to ruin what I had so I decided to keep it with this single sculpt and paint it.

For a base I used a dark tone of brown. Make sure you get into all the crooks (which is quite a task when painting fur)

First layer of dark brown paint.

After that there aren't in between pictures.
His fur is finished with airbrushed light brown
For his pants I first painted it a dark tone of blue and finished it with a lighter tone of blue.
The scythe is painted black, then it received a metal color coating.
The skull is drowned into a grayish brown diluted paint soup and rubbed "clean". This leaves a nice "old" tone to it.

When I made the base I noticed it looked boring, so I created a little forest setting. Stones are made from torn pieces of dried clay, grass it made from painted rough paint brushes (pigs hair) and little twigs from rolled up clay.

The last coating is a varnish. I used the most mat type of varnish they had, because I don't want his fur and pants to be all shiny.
For his eyes, metal and teeth I did use a high glossy varnish.

As a finish I added his signature.

Finished piece

Left side.
Right side

Back side.

I know it might sound stupid, but even I'm amazed about how he turned out. I think he's pretty awesome.
Close up.


Flee Market Signs (2014)

Since a couple of years my aunt helps organizing a flee market that benefits the church.
They have some old road signs and my aunt thought it was a nice idea to get new ones and asked for my help to come up with ideas and make them.

We had some conversations about it and these 2 were our final ideas:


I knew it would take a lot of work to paint these on boards of about 1 meter, so I asked if she was able to help to color them. My aunt knew a lady who can do a good job at painting, so she took one of them to her.

First I drew them using pencil, than I traced my lines with a permanent marker. Later on, after the paintings were finished I redid the tracing and gave it a layer of varnish to protect it from the rain.

My drawing of some flee market things.

The finished sign, which the artist lady finished.


The other drawing.

My finished piece.
The colors aren't that clear due to the sun being on the wrong side of the sign.


Faux Bronze (2014)

One of the things I have learned at my Wood- Marble imitation classes is feax bronze. Which is a technique to turn an ordinary sculpture into a (fake) bronze one.

As a practice model I've used a cement statue of a lion holding a crest. (Which I use as a book stand.)

Finished sculpture
I started by applying a brown coating of acrylic paints. Acrylics are used because cement reacts on other types of paints.

Beginning stage:
I forgot to take a before picture in time.

Brown Sculpture.

After this coating, the sculpture is painted with a special Antique Bronze acrylic paint. This is a more gold tone of color than regular bronze, which is more orange/ copper colored.

When that has dried properly, the whole sculpture is coated with "stove polish". It's a black substance used to, as the word implies, polish stoves. Once this is rubbed on, rub it off again using a clean cloth. If you have a big sculpture, do this in steps; as you don't want to have it dried up and unable to rub it off anymore.

Now it looks already a bit older as the black residue remains in the deeper area's.

To finish it off we used some (gold) bronze powder to accent some highlights using a dry brushing technique.

Finished right side
Finished left side
 In the mean time I've already done some more statuettes, I'll put them here once I've got the pictures ready.