Wednesday, October 2, 2013

FruitCorso; De Bockereyders (2013)

Like every year I join our building team in constructing a float for the FruitCorso parade.
Floats that are decorated with fruits, vegetables and seeds.

A Photoshop drawing I made from a print screen.
This year we got the design of "De Bockereyders" (The Billy-goat riders) which is an old folklore about a couple of bandits who would steal and rob from the rich people and divide it underneath the poor. At least this was the story we choose, since there are all kinds of different stories about them. Some say they are devil worshippers and they plundered churches and old farm houses while other stories tell the same kind of tale as the witch trials in Salem where innocent people were condemned for crimes they didn't do.

Anyway; as said: Our Bockenreyders are the good guys that acted like the Robin Hoods of their ages.

This year we had 2 designers; The one from last year + another builder. They came up with the idea to build 3 male goats, a captain with a mask and a hooded bandit

The model made by our designer.
We used the bars we already had from last year instead of welding a new low one. In the end this paid off quite well as it sorta disappeared inside the design.

I didn't do any welding this year. Instead I and 2 others were put into the Styrofoam cell to sculpt 2 human heads, 3 goat heads, 12 hooves, 4 hands, 2 boots, 4 horns (one set was made from iron) and 2 feet. This was quite a big task and we got some help from outside. A man who has helped several clubs with their sculptures. He showed up and in no time he finished a face and also did the jaw part of our Captain. Next to that he showed us what we had to change about the goat heads to really make them look like goats (we had a cow, aligator and some sort of rabbit).

From these rough shapes we had to make our finished faces/ heads.

I got the responsibility this year to do the final sculpting on the faces/ heads with plaster.
First I made pictures of what we had, then I used Photoshop to try to draw a better shaped face on it and tried to rebuild the face using plaster.

Before
After
After
Before
As you can see the end result is quite a change. But in a good way I might say.

One thing we did different this year were the eyes.

Normally we sculpt the eyes at the same time as the face and decorate them with seeds just like everything else, but I asked if I was allowed to make "real" eyes. I made a prototype from transparent globes, painted from the inside out. The designers really liked what I had created and got to make a set of brown and red eyes.

A transparant ball you can buy at most craft shops.

Finished brown eyes; 14 cm


Finished red eyes; 16 cm

Because we don't want everyone to be making these globes, I don't do an online step by step tutorial. But if you're really interested and want to make them f.e. Halloween, just send me a message and I'll send some of the pictures I made during the process.

They were covered up with plastic foil to prevent damage during the build. In the end that was cut off and the eyes were nice and shiney.

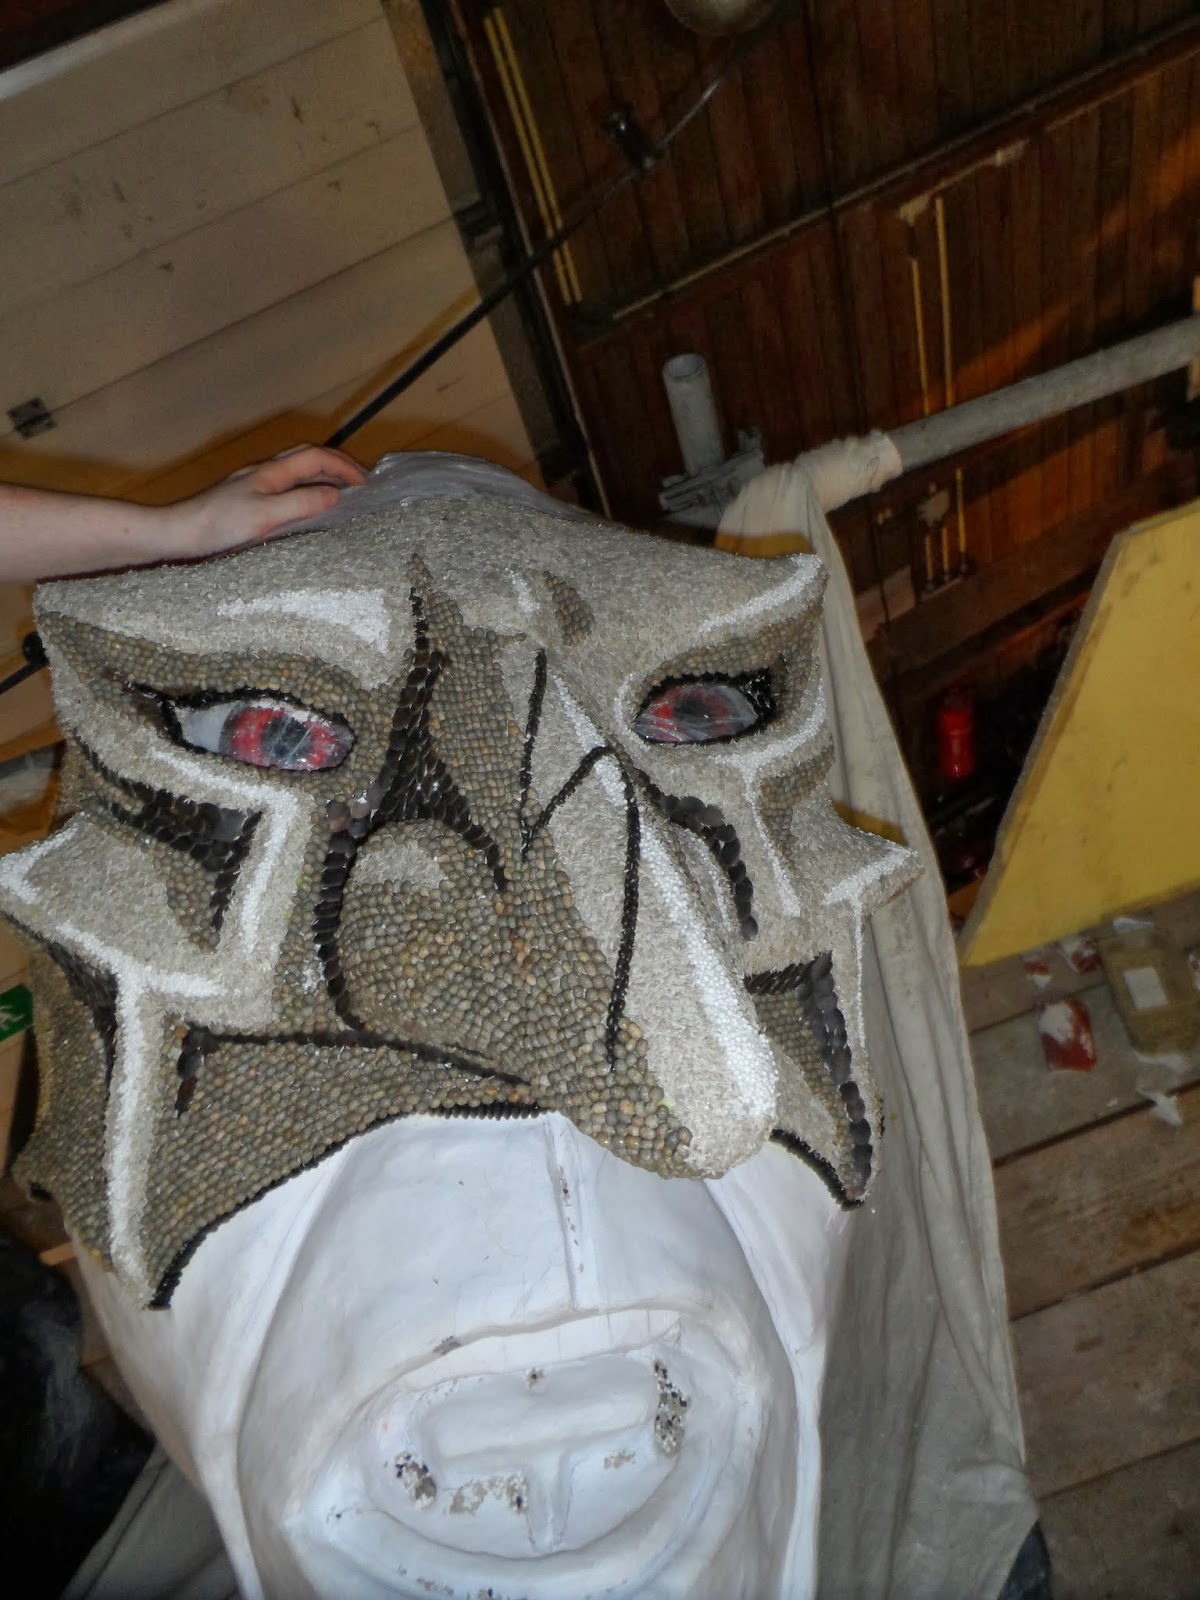
My next task was to design the faces. I worked together with the designers on this. And in the end they had enough faith in me to let me do the whole captains face the way I'd like to do it.
And so I did:
Painting
Adding seeds
Finishing the mask using: Blue Lupines,
Black pumpkin seeds, Black beans, Grass seeds,
Melon seeds and Tapioca.
Painted the lower half and added shade with brown beans.


Because our float was too big to fit through the door and viaducts, there had to be some break points inserted which could be lifted and lowered using hydraulics.


Raising the Captain's torso

Raising the front part of the billy goat. 

Final part of the raising.

The end position of the billy goat and captain.

A close up of the loot.

A very nice picture of the other face that was made.

A print screen of a video that was shot during the parade.

Out float became 8th in ranking by the Jury judgement. But! We got 2nd of the public voting!

Here is a video of the whole parade of the FruitCorso 2013

Sunday, September 29, 2013

Bird Outhouse (2013)

My father collects bird houses to put in this big walnut tree we have in our yard.
For his birthday I thought it would be fun to make a "Bird Outhouse".

Finished bird outhouse.

It's constructed from plywood. I tried pine wood at first but those pieces of board were to curved to work with.
I carved in some lines to make it look like it was made from several boards. And when it was finished I stained it with very diluted acrylic paint and gave it a nice mat varnish.

What you see through the door.
What you see from above.


Inside I made a little stool as you'd see in old outhouses. And I made a tiny toilet paper roll.
The door can be locked using a pin and the top can be opened to see if there's a nest or something.
The toilet stool can be taken out, making it more appropriate for a bird to nest inside.

I placed a little sign on the door that says "Vrij" (Free) and "Bezet" (Occupied)

Also on the side I glued a sign as a bit of a joke:

Fun sign.
A "Schijtlijster" isn't a real bird. It's roughly translated as someone who's chicken.
But the literal translation would be "Prohibited for shitty birds"

Stained Glass Course (2013)

This in the end assignment of my Stained Glass Course, which I followed next to the Wood/ Marble Imitation classes.

Finished piece.

It was an utterly awful design if I may be honest.
We had to pick our own pattern from the internet. I thought this one wasn't that hard because it doesn't have that many pieces.
In the end this happened to be the most difficult one of everyone. Even the teacher had a hard time to get the pieces without breaking the glass.

It became so difficult due to the bent lines. Bent lines aren't that difficult, but if you have to take a hollow shape out of something with a thin "neck" then it is extremely hard not to break things.
The other rookie mistake I made was to use patterned glass, it contains structure and some air bubbles. This glass will eventually break quicker than normal float glass.

In the end I think I tried like 15 times to make the lower dark green parts and about 10 times the orange curls.

I succeeded to make it all on my own, but then some pieces broke during the solder process.
Because we were running low on dark green structure glass, my teacher made the pieces from a different type and color glass.

I'm not done learning so I will make more stained glass items. The teacher is learning how to make stained glass with paintings inside of them (like those in churches). Once he knows enough we might get to learn it too.

Wood/ Marble Imitation Course (2011 and up)


 Some examples of my work from the Wood/ Marble imitation course.
To add:
Walnut Stretched Italic
Walnut Root Wood.

This year I want to learn Mahogany another marble and I'd like to learn how to gild.
St. Anna Marble (2012)
(Unfinished) Walnut Stretched Wood (2012)


Pinewood (2012)


Napoleon Rouge Marble (2012)
Napoleon Gris Marble (2011)


Teak Wood (2011)


White Marble (2011) Water base
Oak Wood Panel; Close up (2011)
Oak Wood Panel (2011)

Dressing Table (2013)


This has to be my biggest assignment yet.
An old colleague of my mother asked me if I was able to make a dressing table for her little daughter.
It didn't matter how long it would take me and she thought it would also be a good learning project for me.
I must say: it definitely was a challenge.

Finished product.

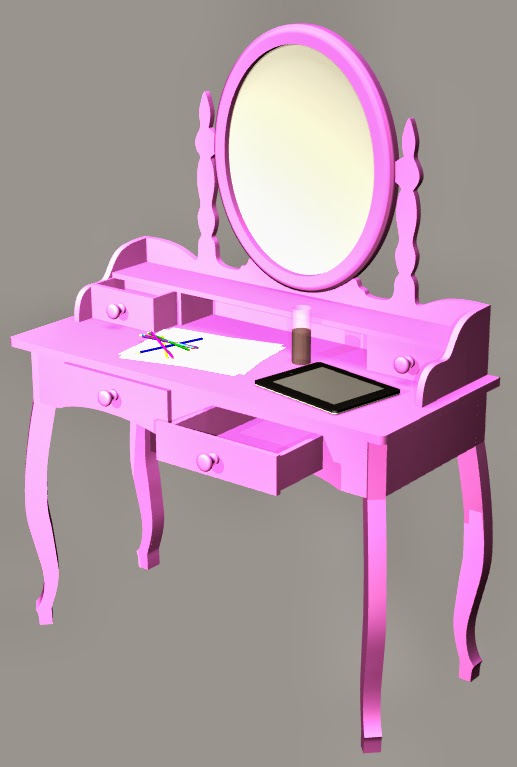
I started off my making a 3D Drawing.
This way I knew what I was capable of, but also how much material I needed.
Because it's a kid version of a dressing table, the legs are shorter than a normal table would be.
Roughly this one is 10 cm lower than an average desk.
3D drawing; I used pink to see things in depth.
3D drawing; I also made several items to show it's size.

After converting it to a 2D blue print using AutoCAD, I was able to calculate what the basic costs were going to be.

I also used the blue print to print out some crucial templates, like the leg, side pieces and the mirror stand.
These were later sawn out of 3mm MDF.

For the legs I there already was a problem: The thickness of the wood would cause trouble for both my fretsaw as well as our jigsaw.
Unfortunately I don't own a bandsaw yet.

The solution was to make the legs from 2 layers MDF which were sawn in shape and glued together after.
To make it seem like one single piece I used a band sander to even the edges.
With a router I made some decoration edges.

Different stages of making a leg.

After the legs were finished I build the main part of the table. I had to keep room in the corners to fit the legs between. The front two legs would be in a 45 degree angle and the back legs would stand flat against the wall.

Bottom view of the table when it was being glued.

The table would get 2 drawers.
The drawer holders would run all the way to the back. This way it would give extra support to the table top to prevent it from sagging.

I used dowels for pretty much everything in sight to prevent screw holes that require extra work to mask them.

Bottom view to show how one of the front legs are connected to the table.

 The last part was to make the mirror bit of the table. This would have 3 functions: drawers, a stand and a mirror.
First I made the frame for the mirror and I used this together with the earlier made template to get a drawing of the backboard.
With a jigsaw I sawed the whole thing free.
Again I used dowels and glue to connect all the pieces.

 
The mirror piece without the mirror, drawers or frame.

The finished wood work. The mirror frame is only secured with double sided tape at this moment.
When I finished all the parts I assembled the whole table to see if things worked.
After that it was time to give it a paint job.
I spoke with the woman on the phone. At first she wanted it to be white, but her daughter didn't agree and wanted it pink. But because she needs to use it for a couple of years she was afraid pink would go out of fashion. Therefor she chose the color silver.


The finished table showing al the drawers.

I didn't do the inside of the drawers on purpose, this is never done because it wears down very easy.

But I wasn't finished with that. She also like to have a stool to go with it.
I designed a pretty basic stool that resembled the same kind of style of the table.

The legs were done the same as the table.
I did however use screws to connect this one, mainly because I needed it to me more secure than the table. Dowels might come loose over time and it didn't have as much connecting surfaces as the table does.

Because MDF is known for its ability to bent or sag over time I made two rods that connected the legs with each other, which makes things a whole lot sturdier.
The woman arranged some fabric for me to make a seat. The seat is made by glueing a piece of foam to an MDF board and then covering it with the fabric using a tacking device.
Perspective view of the stool.
Another perspective of the stool.


 Off course it was also painted silver.

Finished stool.

Coin Flower; Florum Denarios (2013)

A friend of mine had organised a house warming party.
It's normal to bring gifts and she told us she'd really liked to have a "Money tree" in their yard. She mentioned this for fun, she actually wanted money or gift certificates to use for their garden or for tools.

A "Money tree" isn't really original. I decided I liked a money plant way better and I started to design a basic plant using coins.

The Coin Flower, or Florum Denarios in Latin.
I ended up with a 6 leafed flower, that holds exactly 1 Euro in cash. (6x 5c + 1x 20c in the middle and 2x20c+ 1x10c at the back. 20 flowers were put on an iron wire and stuck in some dirt filled PVC pipes.

How to:
  • Make a 6 leafed template and use it to cut the amount of flowers you like.
  • Paint them in a copper color. I painted the backside black.
  • Use hotglue to glue the coins on. Don't glue them to tight together.
  • Cut the leafs up to the middle coin to create separate petals.
  • Bent the leafs; 3 up and curl the edges
  • Glue the 3 bend leafs to the middle coin.
  • Add some stamen; 3 golden iron wire pieces with a gold bead glued on top. (You can also do this last, making it easier to connect the flower to the stem)
  • Glue the base coins at the other side. 
  • Bent a thick iron wire and bent a loop at the end. (The stem; use several lengths)
  • Glue the flower to the loop 
  • Take 6 pieces of PVC pipe and tape them together.
  • Secure these in a flower pot and fill them with dirt.
  • Put the flowers in the PVC pipes.


The flower in 4 steps

To finish it all I made a little information sheet and glued it on the pot.

Mine said: "Coin Flower (Florum Denarios). The Coin Flower is a very rare type of plant. It's a slow growing vegetation which grows the best with as less sunlight as possible. When the plant is placed in direct sunlight, there's a big change the plant will loose its leafs"

I played a bit with the fact that if you keep this plant in sight it's most likely someone will steal the flowers.

Saturday, September 28, 2013

CD Storage Unit; Ammo box (2013)

Finished army box.
In my car I always have the problem where I can keep my collection of CD's. Normally I stall them in the placing in the door, but that wasn't the best option.

At a market I saw ammunition boxes on sale and I thought that would be a great option for storing CD's, but those aren't fit for that purpose, so I made my own.

I started of with by making a box suitable to hold 35 CD's. It's a simple basic box; a bottom, 4 sides + a lid which is constructed in the same way.


A simple, basic box.

This box got painted with acrylics in a nice rusty red. Lateron I can sand through the top layer a bit, which gives it a more rustic old look.
Rusty red.
After the red, it got an army green layer.


"not so army" green.
I wasn't happy with this color and gave it a better army color later on.
Next it needed some words. I looked online what kind of things are written on these kind of boxes. Mostly they contained codes of which I didn't know what they meant. Instead I made my own:
"35 CD Storage unit
120 MM, 700 MB
W.v. D. 30-04-1986"

And this says exactly what it needs to say: 35 CD's. They are 120 mm big and contain approximately 700 MB. My name letters are: W.v.D. I'm female and born at 30th of April 1986.


Cutting out the template.

However I made one crucial mistake: I used spray paint on a paper template. Paper curls up, what means that when you spray paint it, the paint easily gets underneath and blurs the lines.
I had to repaint the failed side of the box 3 times over!
After it was one color again I retried it using the dabbing technique with a paintbrush.

When everything was finished I screwed on the hinges and the lock piece.
And of course I added  35 CD's.


Closed box.


Opened box filled with CD's.
And no, that's not the symbol of a pokéball. I tried to make a CD symbol.


35 CD's alphabetical ordered.