This has to be my biggest assignment yet.
An old colleague of my mother asked me if I was able to make a dressing table for her little daughter.
It didn't matter how long it would take me and she thought it would also be a good learning project for me.
I must say: it definitely was a challenge.
 |
| Finished product. |
I started off my making a 3D Drawing.
This way I knew what I was capable of, but also how much material I needed.
Because it's a kid version of a dressing table, the legs are shorter than a normal table would be.
Roughly this one is 10 cm lower than an average desk.
Because it's a kid version of a dressing table, the legs are shorter than a normal table would be.
Roughly this one is 10 cm lower than an average desk.
 |
| 3D drawing; I used pink to see things in depth. |
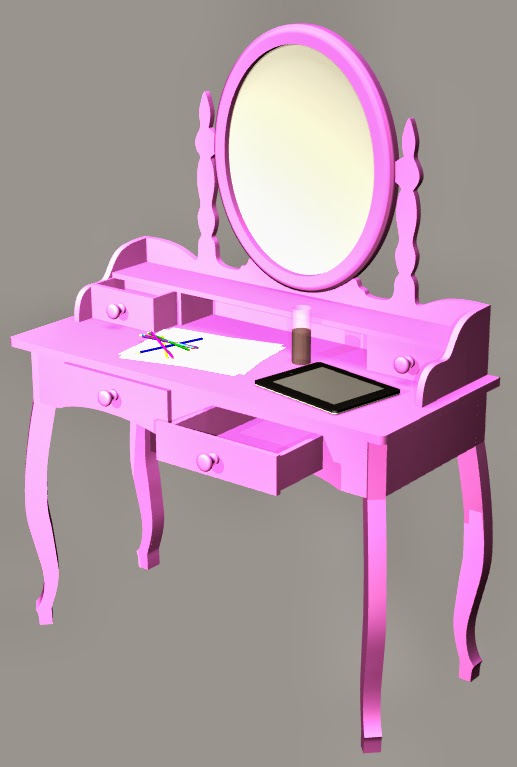 |
| 3D drawing; I also made several items to show it's size. |
After converting it to a 2D blue print using AutoCAD, I was able to calculate what the basic costs were going to be.
I also used the blue print to print out some crucial templates, like the leg, side pieces and the mirror stand.
These were later sawn out of 3mm MDF.
For the legs I there already was a problem: The thickness of the wood would cause trouble for both my fretsaw as well as our jigsaw.
Unfortunately I don't own a bandsaw yet.
The solution was to make the legs from 2 layers MDF which were sawn in shape and glued together after.
To make it seem like one single piece I used a band sander to even the edges.
With a router I made some decoration edges.
 |
| Different stages of making a leg. |
After the legs were finished I build the main part of the table. I had to keep room in the corners to fit the legs between. The front two legs would be in a 45 degree angle and the back legs would stand flat against the wall.
 |
| Bottom view of the table when it was being glued. |
The table would get 2 drawers.
The drawer holders would run all the way to the back. This way it would give extra support to the table top to prevent it from sagging.
I used dowels for pretty much everything in sight to prevent screw holes that require extra work to mask them.
The drawer holders would run all the way to the back. This way it would give extra support to the table top to prevent it from sagging.
I used dowels for pretty much everything in sight to prevent screw holes that require extra work to mask them.
 |
| Bottom view to show how one of the front legs are connected to the table. |
The last part was to make the mirror bit of the table. This would have 3 functions: drawers, a stand and a mirror.
First I made the frame for the mirror and I used this together with the earlier made template to get a drawing of the backboard.
With a jigsaw I sawed the whole thing free.
Again I used dowels and glue to connect all the pieces.
 |
| The mirror piece without the mirror, drawers or frame. |
 |
| The finished wood work. The mirror frame is only secured with double sided tape at this moment. |
After that it was time to give it a paint job.
I spoke with the woman on the phone. At first she wanted it to be white, but her daughter didn't agree and wanted it pink. But because she needs to use it for a couple of years she was afraid pink would go out of fashion. Therefor she chose the color silver.
 |
| The finished table showing al the drawers. |
I didn't do the inside of the drawers on purpose, this is never done because it wears down very easy.
But I wasn't finished with that. She also like to have a stool to go with it.
I designed a pretty basic stool that resembled the same kind of style of the table.
The legs were done the same as the table.
I did however use screws to connect this one, mainly because I needed it to me more secure than the table. Dowels might come loose over time and it didn't have as much connecting surfaces as the table does.
I did however use screws to connect this one, mainly because I needed it to me more secure than the table. Dowels might come loose over time and it didn't have as much connecting surfaces as the table does.
Because MDF is known for its ability to bent or sag over time I made two rods that connected the legs with each other, which makes things a whole lot sturdier.
The woman arranged some fabric for me to make a seat. The seat is made by glueing a piece of foam to an MDF board and then covering it with the fabric using a tacking device.
 |
| Perspective view of the stool. |
 |
| Another perspective of the stool. |
Off course it was also painted silver.
 |
| Finished stool. |


