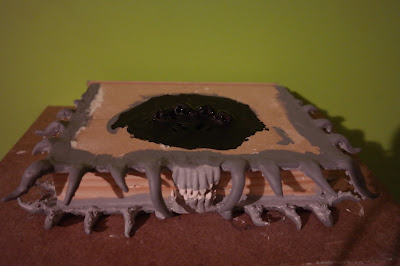
At first this started as a prank for a "Sinterklaas surprise", but it turned out better than I hoped, so I kept it myself.
A "Surprise" is a crafted way to wrap a gift. Most often you make something typical of the person who will get it. This person is a fan of a.o. Harry Potter and therefor I wanted to make a "Monsters Book of Monsters" from the movie. Instead of making it out of cardboard I wanted to make one of wood/ clay and fake fur.
 |
| My "Book of Monsters" |
 |
| A comparison between the real replica and mine. |
Because it had to be made to hold a specific gift I didn't take measurements from the actual book.
With clay I've added the tentacles, eyes, teeth etc.
This is basic air drying clay. I do recommend to wet the wooden surface when you attach the tentacles. Even better is to first rub a layer of clay firmly to the (wet) wood and add the tentacles to that. If this fails, you can always use some wood glue to attach them once dry.
 |
| Opened book, unpainted |
These are attached with wood glue.
For the eyes I've used some stuffed animal eyes I had once bought 2nd hand.
 |
| Some Base colors |
The book had some detailed carved letters. I can't carve that well out of wood, luckily clay is a lot easier. I've used a toothpick for this; the "ugly" edges can be sanded when the clay is dry.
 |
| Carved clay |
Once all the clay parts are in place, the paint job starts. First of are some base colors. When those are applied the actual colors can be put on.
Mostly I used the "dry brushed" one and on the tentacles I've also splattered a bit diluted paint.
The letters are painted gold first then I added dark grey by holding the brush flat, this way it doesn't get into the letters (I might redo the gold bits, because I'm not 100% satisfied with them as they do not show that well).
After the paint I added a semi gloss clear varnish. If you like your book to look more slimey/wet I suggest you use glossy varnish.
 |
| Top view with the base coatings |
When the varnish part is done it's time to add the fur. This is a tricky task. But I cut a piece that was big enough and glued it with hot glue on my book. At the places where the letters and eyes were I cut a hole. You can play around with the fur a bit to readjust it and it's okay if you cut to much; you can always put tiny patched back and comb the hairs a bit so it's not that noticeable.
I wanted to say: Then you're done, but there's one more part: Adding the pages.
I've looked on google for pictures and found one. Using Paint I copied and mirrored it, so I could align them in the middle (where the teeth are, so you can hardly see the seam).
I've looked on google for pictures and found one. Using Paint I copied and mirrored it, so I could align them in the middle (where the teeth are, so you can hardly see the seam).
And now you're actually done. You can always make the inside look nice with some velours/ velvet fabric or just paint it.
(If you might wonder what my friend got instead: I made a last minute Tardis from cardboard, so no harm is done. Lucky for my I've already had some experience making Tardisses ;))


No comments:
Post a Comment